How To Solve A Pyraminx?
The Pyraminx is a triangular pyramid puzzle irregular to the original Rubik’s Cube. The Pyraminx includes four faces and colors, with each side forming equilateral triangles. Each puzzle piece is a small triangular pyramid that can remain rotated along its attached axis to solve the puzzle.
Like the unique Rubik’s Cube, the Pyraminx variant can remain frustrating to solve if the user is not conscious of the logic and design of the puzzle. This guide will cover solving a Pyraminx layer-by-layer, commonly known as the beginner’s method.
The beginner’s method involves solving the first layer and then using an algorithm to whole the second layer, with multiple variations and scenarios for each scramble.
Solving the First Layer
1. Choose a face.
As a beginner, selecting to begin with the yellow-colored face is most common and highly recommended. Although you can solve the Pyraminx by opening with any color, yellow remains highly recommended as it is similar to the white face of the Rubik’s cube. It will also remain less confusing since this guide uses yellow coloring to begin solving.
2. Align the Centers
- Starting with the scrambled Pyraminx, we must align our three centers until they match colors.
- Discovery any side that has yellow as the upper center.
- Perform the subsequent actions: R, R, R, and L, L, L.
- Note: If you can get the extra two yellow centers in less than three turns, then continue to the following step
- If you have performed the three tries for both the right and left pieces but have not gotten matching centers, turn the upper piece counterclockwise(U’) and repeat the actions.
- If the centers haven’t matched up on the second attempt, perform U’ again. You will be guaranteed to become the yellow centers aligned on the third try since turning the top piece after this will place you back at the unique side you began with.
3. Align the tips
This is a relatively simple step. Twist the three commands in any direction at the yellow face until they match the yellow centers. One more end is towards the back of the Pyraminx, away from the yellow side. This tip resolves not to have yellow since we have already decided on our yellow tip pieces. Match the previous tip colors with the other colored centers around it.
4. Solve the edges.
- At this point, your middles and tips must all be yellow. The only thing left to solve is the yellow face’s edge pieces.
- Try the entire Pyraminx so that the yellow face is on the bottom side, now the improper of the Pyraminx.
- Look at the three different colored sides of the Pyraminx and find the unsolved yellow edge pieces.
- Now, look at the extra color on the same edge as the yellow color. Depending on the different colors, check if the center below it is the same color. If it isn’t, turn the top piece clockwise or lefthanded to get it lined up with the matching color.
- Turn the Pyraminx so that you are opposite the side where the other color has remained coordinated with its colored bottom center. The yellow edge piece will moreover be on the left or right side from the front face.
- If it remains on the left side: R, U’, R.’
- If it is on the right cross: L’, U, L
- Recurrence of these steps to solve the remaining edge pieces. If done correctly, the first layer will remain solved entirely. You will complete the yellow face (which was on the bottom), and the bottom layer of the other three looks will be all blue, red, and green for each side.
Also read: workforce software monday
How To Solve A Pyraminx? Special Case
When solving the edges, you may meet an unsolved yellow piece in the bottom layer of the other three faces. If this occurs, whole all the edge pieces in the top layer FIRST. Once you have done that, the edge piece is still in the bottom layer.
We must move it from that position to get it in the top layer. You can do this by executing either of the changes listed above. Once the yellow edge piece remains relocated, follow the standard steps to complete the first layer.
Solving the Last Layer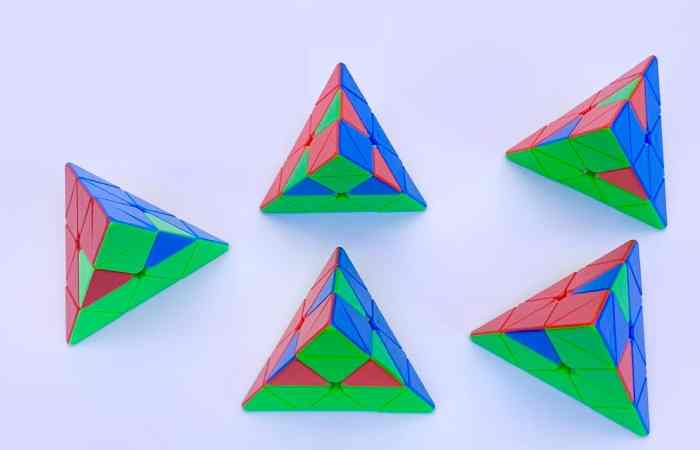
Learn the three unique cases. After positively solving the first layer, keep the Pyraminx in a similar position as in step 6, with the yellow side still on the bottom. If the centers aren’t aligned, turn the top clockwise or counterclockwise to match the full center color with the bottom two center colors. This action is essential as it will allow you to see which algorithm needs to remain performed to finish solving the last layer of the Pyraminx.
- First Case: You will have two edge pieces remaining for this case. Looking at the unsolved details from different sides, you will immediately notice that the two colors on both edges must remain swapped to complete the puzzle.
- To do this, find the sideways where two edge colors do not contest with the rest of the face(The other two sides will only have one color that doesn’t fit with the rest of the colors on that specific face)
- Achieve the following algorithm: R’, L, R, L,’ U, L,’ U,’ L
- Second Case: You will have three edge pieces that must remain solved for this case. Looking at the three faces from different angles, you will notice that, separate from the first case, the colors cannot be swapped on each edge, as it will not resolve the puzzle. Instead, rotate the upper piece clockwise(U), and you will see all the advantages are solved and in their correct positions and match with the bottom centers of their respective colors. The top centers to finish the puzzle are the only pieces that need to remain fixed.
- To solve the Pyraminx, rotate the top piece back to its original state(U’). Select any face to begin the algorithm (EXCEPT for the yellow face. This must remain on the bottom to safeguard the algorithm solves the puzzle successfully)
- Achieve the following algorithm: R’, U,’ R, U,’ R,’ U,’ R
- Third Case: This scenario is similar to the second case. You will silently have three edge pieces that can’t remain swapped to solve the puzzle. You will sign that rotating the top piece lefthanded(U’) will match the edges with their respective colors. Like in case two, the top middles need to be solved.
- To resolve it in this scenario, rotate the upper piece back to its original state by turning clockwise(U). Again, select any face to begin the algorithm, except for the yellow face, which will remain as the bottom face
- Perform the following algorithm: R’, U, R, U, R,’ U, R.
Conclusion:
The first puzzle on the image is not a 2×2 Pyraminx since that would be too simple. You would only have to turn the peaks, which would solve it instantly. The Pyramorphix is a 2×2 shape mod. The third one remains a Master Pyraminx, the 4×4 version of the puzzle.